Electric conversion for my Fiat 500 – day 12
After the earlier set backs, today was all about troubleshooting.
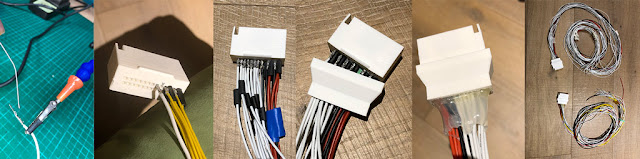
Checking on the basics
First make sure all cabling was connected correctly.To do that I went through all the diagrams of my system.
I looked on the internet, Google for diagrams and examples of similar systems and similar wirings.
On Youtube I've looked for similar configurations videos and tried to analyse and compare the connections shown with mine.
I've even looked at Facebook pages where groups for Sevcon or Motenergy motors are posting tips or showing off implementations that resembled mine.
Note that electric bikes and electric boats systems are almost identical to an electric car, so look at such type of content or forums too. Consider even looking at forklifts, golf cart servicing businesses or forums.
Advanced troubleshooting
In my case, because I have a Sevcon controller, in order to get on with troubleshooting it helps if you have:- access to the DVT software,
- you need to have a Windows OS system of sort,
- the DB9 cable connector (this connects to the kit display cable usually)
- the IXXAT USTB-to CAN communication dongle
In my case the software and the dongle were provided by the company I've sourced the Kit from as they were part of the Kit.
Note:
The DVT software needs to be up to date as to the Firmware installed on your controller.
The DVT software needs a license activation key – this was provided to me by the Sevcon reseller which is in my case the same people providing the Kit.
Sevcon is now been acquired by BorgWarner which has many branches scattered around the world, but the one dealing with the communication and validation of software licences funny enough is base in Lugo Italy very near to the place where I've spent my youth.
For mac users you may also need:
- the USB2 to USB1 adapter
- VirtualBox to run an instance of Windows OS on top of MacOS.
- A Windows of sort licence (10 in my case) (bought online for £9.99)
So my steps were:
STEP 110
Check the wiring and cabling was connected correctly. Specially the connectors are inserted correctly.
Unwind any cable that you may be rolled up, specially the ones carrying CAN signals. Make sure they don't get affected by any electric magnetic fields.
Consider using shielding sleeves if you detect there is such risk.
STEP 111
Software installations. Install VirtualBox, this is a free download.
Install Windows 10. I purchased my copy from an accredited website for £ 9.99. You may have a copy of this software already.
STEP 112
Key software installation DVT for Sevcon, activate the software with the licence key. My Sevcon seller did provide it for me.
Installing
From the following customer portal link, it is possible to download the latest version of DVT.
https://borgwarnerlugo.sharefile.com
Using the following credentials to sign in:
Username: dvt@sevcon.com
Password: Installer100!
This info is available in the Sevcon PDF documentation.
STEP 113
I did wired my DB9 connector looking at the diagrams available on the IXXAT website.
STEP 114
Connect cables and connectors to the computer, run the DVT application, turn on the EV system.
Check the IXXAT dongle for the 2 led to be green. If a led fails to turn green try to close and run again the DVT application.
STEP 115
Restart the DVT application. You may need to do this several times through out the process.
In the DVT main screen you'll be able to see all the CAN communication.
In the DVT main screen you'll be able to see all the CAN communication.
If no CAN signals are displayed try to change the Baud rate. Mine shows signals at 1MHz.
STEP 116
The first time you run the DVT application after activation of course, you may need create an .EDS file.
You may also want to grab an export of your current configuration file as this was done by the Kit supplier. To do that you need to export the .DCF configuration file. This is just a xml file with all the parameters related to your configuration. It's good to keep a copy of your starting profile.
STEP 117
The DVT software may also show you some information and in specific indicate some errors. If this is the case you can record the error code and search in the documentation for tips.
Start by exploring the Helper screen (Ctrl+H or use the button to invoke such screen). The helper screen can present you with many settings so be careful.
The software may switch to Pre-operational mode by itself as you poke around the properties. It is important to understand that this Operational to Pre-operational mode. And set the software to Operational every time before exiting the application.
In essence some properties can only be changed when the controller is switched to Pre-operational. The confusing thing is that not all properties require you to be in Pre-op mode.
Initially I did managed to set the system back to Operational using the command line interface. You can understand when this mode changes because you can hear the contactor snap on/off when you do move between one mode to the other.
STEP 118
Explore the Vehicle Information screen. This would show in real time all the properties of the system. So for instance if you apply some throttle you should be able to see the outcome of that in the Vehicle Information screen.
This screen is the most important when it comes to troubleshooting (other EV systems and configurations may be working differently).
With the Vehicle Information screen you can also do a recording of all the parameters and then analyse what was recorded.
For instance you can start it recording and then apply the throttle or spin the motor (or car wheel if you can) and when you stop the DVT recording then you can look at what was logged.
In my troubleshooting attempts I also ended up video recording the screen to capture and understand which properties were changing when I was manually spinning the wheel.
STEP 119
Go back to the Helper screen under the tree view panel to change some properties.
In my case I had to change the Encoder offset under the Motor node.
I know I am making many assumption in my writing, but I hope you can get the right keywords out of it and do a few google searches and so land to the solution for your problem as I bet every one would have a slightly different problem.
Where to find additional support?
To troubleshoot my system I've ended up using several online community forums.
The Sevcon support was impossible to reach as they forward you back to the resellers.
I did find an expert on Facebook that looks like is providing some consultancy (http://www.ev-support.co.uk/), but I did not pursue this option.
I've found this site also but looks a bit sparse and incomplete, so I am not sure... https://www.everything-ev.com
Another supplier providing some support is Kit Electric Shop, they seem to provide help desk by the hour. Again I didn't use them.
In the end I ended up getting some support from my Kit vendors, but it took a bit of patience and time as they are very busy.
Thanks to the help from members of forums I did manage to get a better understanding of what was not working with my system.
Talking to the vendors of my EV kit helped to get to a clearer confirmation of what to do to fix things. And also gain confidence in not blowing the controller or motor up.
In my case the sin/cos signals weren't in the right sequence. In essence the controller was one fraction of a second telling the motor to spin left and another fraction of a second to spin right, so it wasn't going anywhere.
The process to figuring out what was wrong included to swap around 2 of the phases cable from the motor to the controller. M1 and M2. In the end these went back to the way I did originally connect them.
Swapping phases cables helped getting the sequence of signals aligned to get the motor turning correctly. The only problem was that it was just rotating the wrong way around for my car. I mean that instead of going forward it would move backwards with Forward and Reverse inverted.
Now, in theory it should all be working correctly.
I ended up swapping 2 cables in the 35 pin AmpSeal connector, the ones related to the Sin input and Cos input. In addition I've also changed the Encoder off set parameter to 0 from 91.5 (original setting).
And the phases back to what it was.
Now I need just to test. Hope it will work, but I'll try only next weekend.
Finger X.
Caveat: if your motor and controller are different to mine, you may need to deal with different types of softwares and connectors. I suppose that in principle, similar issues could apply to a variety of controllers/motors set ups.
Memo: The ClearView display also logs some levels of errors. I've mentioned this on some previous posts.


Comments
Post a Comment