Electric conversion for my Fiat 500 – day 8
Lay battery cables from the front to the back of the car.
As I am planning to keep my primary batteries on the front of the car where the fuel tank was, I need to lay power cables from the front to the back of the car.

Luckily the Fiat 500 is just 3m long bumper to bumper.
I'll be using 35mm2 hi-voltage copper cabling. I've sourced 10m of it, but for this specific purpose I'll use only 6m of it.

If you want to keep your costs reasonable, you need to be careful and look around for these types of cables because some options could be very expensive and impact the budget for your project.
You need also lugs and a way to crimp them. I do this at the hackspace where I go with a manual crimping plier that support my cable size.
A few cable ties/zip ties.
I my case I have drilled a hole behind the back seat, towards the left side, but I've later realised that it wasn't really necessary as there are already open gaps that can be repurposed.
So on the right side of the car I've used the existing hole which I think was used for securing some seat belt. I just made the hole slightly wider.
This is with what regards passing the cables from the passengers area to the rear engine bay.
With regards to the passing cable from the front bonnet to the passengers area I have repurposed the holes were the fuel line goes through on the left hand side of the car and the heating duct on the right hand side of the car.
Considering my cable is 12mm in diameter, you may wanna have a hole.. say.. 18-20mm in diameter.
I've used also some silicone glue and the top neck of a PET plastic bottle to create a protective ring to slide the cable trough and protect the cable from the edges of the hole in the body of the car.
You may need also some electrical tape of a colour that gives a good contrast with the colour of your power cables. In my case the cables are orange. I'll be using the tape to create extra protection to the cable on those points where the cable could brush against the body of the car, so that if the tape and cable get worn out I can quickly spot the problem with a simple visual inspection.
Here is the outline of my steps.
STEP 70
Remove fuel line from the front section of the car and the seal ring securing the fuel line. This is located below the knee protector in the front passenger/driver section.
STEP 71
Remove the air duct on the right hand side of the car that take the hot hair from the tunnel of the car to the front bonnet compartment. Also remove the flange which is held with two 8mm bolts. (you may have done this step before when laying the charging port).
STEP 72
Unscrew the aluminium profiles at the bottom frame of each door and lift up the interior mats. This is done on both sides of the car. 5-6 cross screws need undoing.
You'll see where all the existing electric cabling are running through the car. We'll be laying out our cables next to the existing ones, one on the left, our second cable on the other side the right side of the car.
STEP 73
Widen to 18-20mm the holes that were used for seatbelt anchoring on the floor of the passengers section and put some silicone around it so to protect the metal from rust and make a soft padding for the cable to fit trough. You may want to consider also to apply some anti rust before applying the silicone, obviously waiting the appropriate drying times. You can access these holes from the inside as well as from the outside of the car.
Caveat - Seat belts?! Regulations have been changing through the years and recently with regards to classic cars in the UK and also in other nations, seatbelts are no longer required on vehicles that weren't originally provided with. However seatbelt anchoring can still be retained with some sort of flanging or by using a different anchoring point.
Caveat - Not all Fiat 500 may have a hole on the floor in the rear passengers area. Mine did. However you can still safely create this hole or figure out another place where to create an opening or use other existing ducts such as the heating duct.
STEP 74
Cut 2 lengths of 35mm2 power cable 3 m long each. This cable is 12mm in diameter including the cover jacket sleeve/Sheath and I've used a metal sheet scissors, but good size diagonal cutter may do it too.
STEP 75
Crimp the lugs on each end of the cables. In total you'll need 4 lugs. Don't forget to slide the shrink tube in the cable before crimping the lugs. Heat the shrink tube in place.
STEP 76
Pass the cables trough the length of the car. One, would be on the left side is for the – minus current polarity.
Slide it trough the front fuel line hole, then keeping it under the mat lay it under the wheel arch, under the bottom of the door frame trough to the back passenger seat area down the hole on the floor. Then from outside the bottom of the car add a protective PVC sleeve to the power cable and with the zip ties take the cable to the engine bay. Be careful to the swing arms, you don't want these to be anywhere near your cable as they may cut the cable. Make sure the PVC sleeve goes to the outside from the floor hole to the engine to protect the cable.
Similarly lay the other 3m cable which would be on the right hand side of the car and carrying the + plus current polarity.
Slide it from the front bonnet section trough the hole that was serving the heating duct. Slide the cable below the mats around the front right arch of the wheel, trough the bottom of the door, the hole on the floor then off the bottom of the car add the PVC protecting sleeve, secure the cable in the sleeve and pin it tight with the cable zip ties till the cable reaches the engine bay. You can tie it to the heating main duct and just be careful to the keep away from the swing arms.
You should have now laid your power cable from the front bonnet area trough to the passengers section to the engine bay, one cable on the left side and one on the right.
The minus cable will latch to the - battery and to the -B in the controller. The + plus cable will connect to the + battery trough to the main contactor. You can also add additional shunts or safety switches, and I may come back to do some of that later on in the project.
STEP 77
Wrap the power cables with electric tape at any points where a potential point of friction could happen. Silicon seal around the holes that feel a bit sharp or loose. Wait silicone to dry.
STEP 78
Tuck back the mats and
STEP 79
Fit back the aluminium profiles at the bottom of the door frame screwing in the 5-6 cross screws on each side of the car.
Job done! Main power cables are laid.
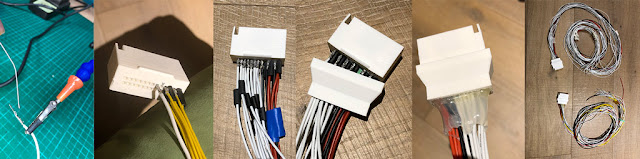
Example of crimped lugs on a hi-voltage power cable.


Comments
Post a Comment